How to setup the Backup for Workgroups Software
Backup for Workgroups makes it easy to backup your Windows Server.
It takes just a few steps to setup the software and the typically installation
is complete in minutes.
Backup for Workgroups is designed to backup multiple computers on a network,
but it can also be configured to backup just a single Windows Server. So
the first question is how many computers do you want to backup?
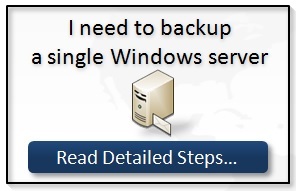
How to backup a single Windows Server
Its easy to backup a Windows Server - here is a quick overview.
-
Add a large storage drive to your Windows Server.
-
Download the Setup Software.
-
Run the Setup Program, select your backup storage drive and you are ready
to backup.
That's it - with just 3 steps you can begin backing up your Windows server
with Backup for Workgroups. Backup for Workgroups supports Windows Server
2019 / 2016 / 2012 / 2008 / 2003 both 32 bit and 64 bit and the Small Business versions of
Windows Server. It includes an open a file add-on that allows the backup
process to backup all files on the Windows Server including locked files such as
Exchange Database files, SQL Server Database files, and Domain Controller's
Active Directory.
Follow the 3 simple steps below to backup your Windows Server:
Step 1 - Setup the Storage Drive
Before downloading and installing Backup for Workgroups you will need to have
your storage drive in place and accessible by your Windows Server that you plan
to backup. You can use
an internal hard drive, an external drive such as USB or eSATA, or a NAS or
network share. Backup for Workgroups supports just about any storage that is
accessible by Windows and appears as a hard drive, here are the most common.
We recommend using a large internal hard drive, this will give you the
fastest possible backup speeds and the drive is always available. If you
plan to use a NAS as the backup storage click here to read information about NAS
backup storage.
In our example below we have installed a internal 1TB drive in a Windows SBS
Server. If you use a USB drive as the storage it will be treated the same
as an internal drive since both are accessed through a drive letter.
If the drive you plan to use is not formatted or the drive is formatted as
FAT32 we suggest formatting the drive using NTFS. It is common for USB
drives to be formatted FAT32 so that they are compatible with other operating
systems. So if its a USB its a good idea to reformat it as NTFS.
To format a new, blank, internal hard drive:
- At the Windows Server's Desktop - right click on "Computer" and choose "Manage."
- At the Server Management screen expand the Storage section and select Disk
Management. Windows will pop-up a wizard, to walk you through the process of formatting
the new drive and assigning it a drive letter. If this wizard does not pop
up, right click on the drive and choose Format.
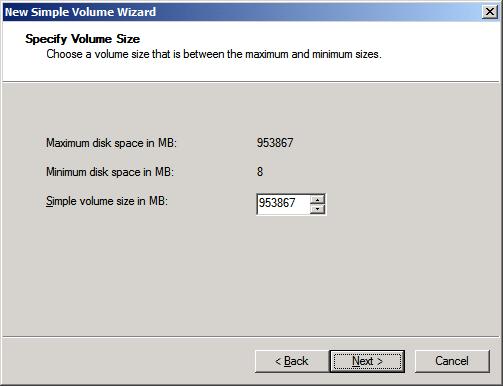
- Press Next to navigate from the Welcome screen to the New Simple Volume
Wizard.
- Enter the amount of the drive to setup for this volume. Normally you
would use the default to use the entire drive space. Press Next to
continue.
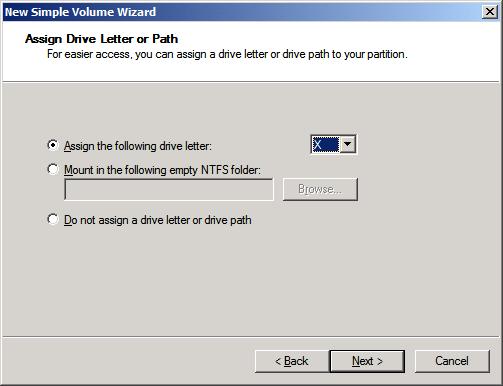
- You can now specify a drive letter for the new drive. We suggest a
drive high in the alphabet for several reasons. The first reason is when
there is a gap in the drive letter sequence it works like a comment to yourself
that this drive is for a specific reason - namely to be used for backup data not
routine file storage. The second reason for setting a high drive letter is to avoid conflicts with
other drives or USB devices that may not be attached at this time.
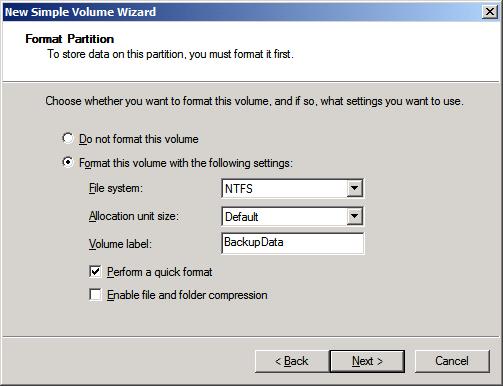
- Choose to format the drive as NTFS. You can enter a Volume Label that
is a comment to yourself. We recommend using a volume label such as "BackupData".
You may want to perform a
quick format. A regular format can take over an hour on a drive over 1 TB.
- Review the summary information that is presented. If you wish to make
any changes you can press Back to go through the process again. Otherwise, Windows is now ready to format the new drive. Press Finish to begin
formatting the drive.
- When Windows has finished formatting the new drive, you will return to the
Server Manager screen. Now you can see that the new drive appears in the list above and it is ready
to use.
Step 2 - Download the Backup for Workgroups Setup Program
At this point you should have your backup storage drive connected to your Windows Server
and the drive is formatted NTFS and ready for use.
You are ready to download the Backup for Workgroups setup program.
Click on the Download Now button below. Enter your contact information
then return to this page.

Step 3 - Run the Backup for Workgroups Setup Program
You are now ready to run the setup program.
- Go to the Windows Server that you plan to backup.
- Run the bfwsetup program.
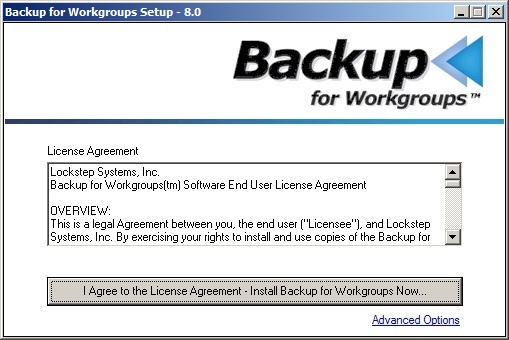
- Press the button to agree to the license agreement. The setup program
will now install Backup for Workgroups. When the installation process is
complete, the welcome screen appears.
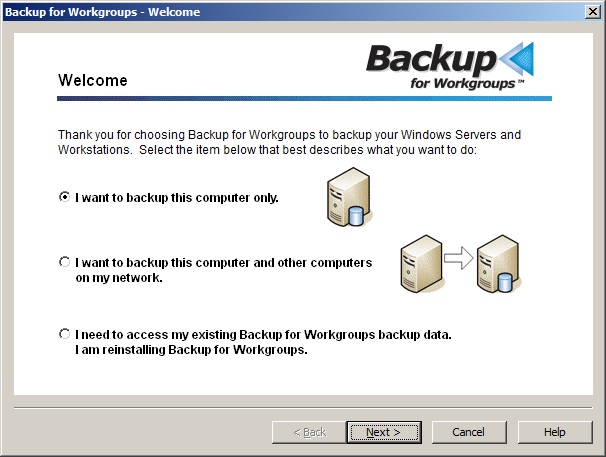
- At the Welcome screen choose the top item to indicate that you want to backup
this computer. Backup for Workgroups will setup one backup client account
for this computer. Press Next.
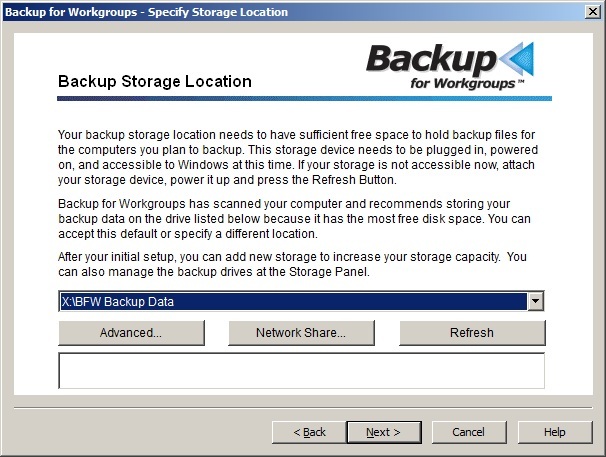
- On the Backup Storage Location dialog, you inform Backup for
Workgroups of the location of the backup storage device.
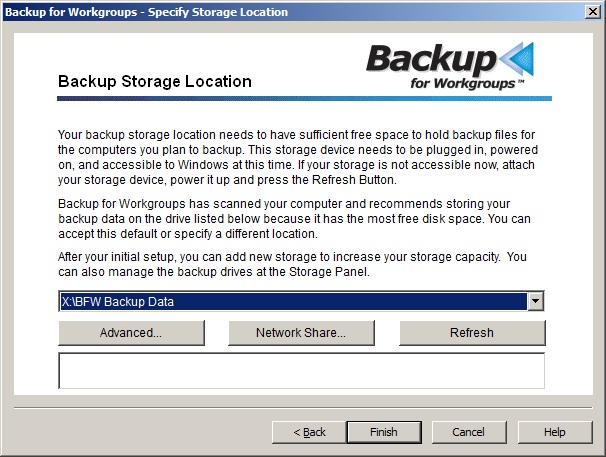
Backup for Workgroups will default to selecting the largest drive on your
computer that has most free space. The setup program should automatically select the
internal drive
because in our example, it is the drive with the most free space. As seen
above, Backup for Workgroups is going to store your backup data on the X: drive,
under the BFW Backup Data directory. If the Setup program does not
automatically select the correct storage location, then use the drop down box to select the
internal Drive.
- Press Finish to complete the setup. Now the Backup for
Workgroups main program screen appears, as seen below.
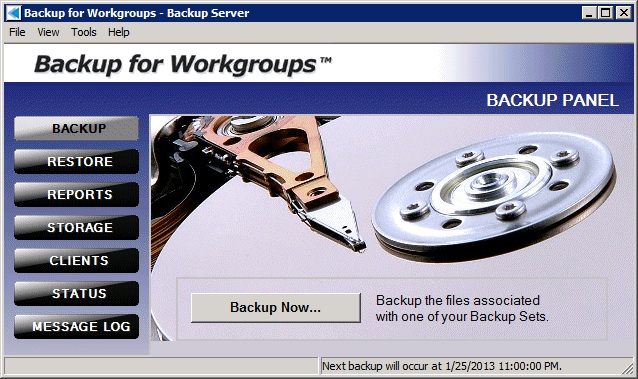
Backup for Workgroups has a built-in backup set that is defined to backup all local drives
on the Windows server at 11:00 pm. Backup for Workgroups also has a built in
open file add-on that allows the backup process to backup locked files on the
server, this includes Exchange, SQL Server, and Domain Controller Active
Directory databases.
You can press the Backup Now... button to start your baseline backup now, or
you can let the default, scheduled backup execute at 11pm. Please note
that your computer must be powered on at 11pm in order to perform the backup.
If this time is inconvenient or you prefer another time, you can go to
Tools>Manage Backup Sets to change the time on the All Local Drives backup set.
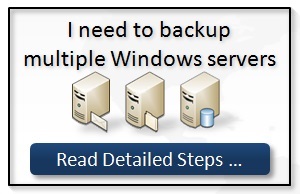
How to setup Backup for Workgroups to backup multiple Windows Servers
Backup for Workgroups makes it easy to backup the Windows Servers on your
network.
It takes just 4 steps.
-
Select a computer to act as the Backup Server - The Backup Server
manages the backup storage and manages the Backup Clients.
-
Setup Storage Drive - Select a hard drive, USB drive, or NAS unit
to store your backup data.
-
Setup the Backup Server - Download the Backup for Workgroups Setup
program and install on the Backup Server.
-
Install the Backup Clients - Download and install the Backup for
Workgroups Setup program on each computer you would like to backup.
That's it - with just 4 steps you can begin backing up the Windows Servers on
your network
with Backup for Workgroups. Backup for Workgroups supports Windows Server
2019 / 2016 / 2012 / 2008 / 2003 both 32 bit and 64 bit and the Small Business versions of
Windows Server. It includes an open a file add-on that allows the backup
process to backup all open files on the Windows Server including locked files such as
Exchange Database files, SQL Server Database files, and Domain Controller's
Active Directory.
Let's go through the 4-step process in more detail below. Follow along
on your computers.
Step 1 - Select the computer to act as the Backup Server
Backup for Workgroups is a client / server application. You need to select
one of your computers to be the Backup Server. This computer can be a
Windows Server or a Workstation, as long as it is running Windows 2003 / XP or
higher you can use it as your Backup Server. The Backup Server needs access to enough disk based storage such
as internal drives, external USB / eSATA drives or access to NAS or network shared
storage. When possible, try to install the Backup Server software on a
computer with a relatively fast processor to keep your backups running as fast
as possible. Backup for Workgroups will take advantage of multi-core CPUs so we recommend dual or
quad core processors. Backup for Workgroups does not use a lot of memory
so 2 to 4 GB of RAM is normally just fine.
The key thing to keep in mind when selecting your Backup Server computer is
its access to
storage. If you want the fastest running backups and restores possible,
then you need to use the fastest storage - internal SATA drives. We
strongly recommend using internal SATA drives as the backup storage media. You can use NAS or network storage, but these units tend
to have finicky rights settings that can take a little trial and error to setup
until you get Windows and the Linux OS on the NAS unit to play nicely with each
other.
The computer you choose to run the Backup Server software can be a computer
that you wish to include in the backup process or not. It is common to
select one of the computers that you are planning to backup to operate as both
the Backup Server and a Backup Client. Be aware that when the other
computers are performing their backups the Backup Server computer will be under load. This may
not be an issue since most backups run during the night. Let's assume you have an Exchange Server, a SQL Server, a File Server and a Domain
Controller. You may choose to use the domain controller as the Backup Server
since it is most likely lightly used at night.
Step 2 - Setup Storage Drive
Before downloading and installing Backup for Workgroups on the computer you
selected as the Backup Server, you will need to have
your backup storage media in place. You can use an
internal hard drive, an external drive such as USB or eSATA, or a NAS or network
share. You can also span your storage across dissimilar drives if the
amount of storage space you need is larger than one hard drive's capacity.
Backup for Workgroups supports just about any storage so long as Windows sees
the storage device as a drive.
We suggest using internal hard drives to hold your backup data because they
are the most reliable solution. Internal drives are always available and accessible. Unlike USB drives and NAS units that
can be powered down separately from your Backup Server, internal drives are always
available concurrently with your running Backup Server.
In our example below we have installed a internal 1TB drive in a Windows SBS
Server. If you use a USB drive as the storage it will be treated the same
as an internal drive since both are accessed through a drive letter.
If the drive you plan to use is not formatted or the drive is formatted as
FAT32 we suggest formatting the drive using NTFS. It is common for USB
drives to be formatted FAT32 so that they are compatible with other operating
systems. So if its a USB its a good idea to reformat it as NTFS.
To format a new, blank, internal hard drive:
- At the Windows Server's Desktop - right click on "Computer" and choose "Manage."
- At the Server Management screen expand the Storage section and select Disk
Management. Windows will pop-up a wizard, to walk you through the process of formatting
the new drive and assigning it a drive letter. If this wizard does not pop
up, right click on the drive and choose Format.
- Press Next to navigate from the Welcome screen to the New Simple Volume
Wizard.
- Enter the amount of the drive to setup for this volume. Normally you
would use the default to use the entire drive space. Press Next to
continue.
- You can now specify a drive letter for the new drive. We suggest a
drive high in the alphabet for several reasons. The first reason is when
there is a gap in the drive letter sequence it works like a comment to yourself
that this drive is for a specific reason - namely to be used for backup data not
routine file storage. The second reason for setting a high drive letter is to avoid conflicts with
other drives or USB devices that may not be attached at this time.
- Choose to format the drive as NTFS. You can enter a Volume Label that
is a comment to yourself. We recommend using a volume label such as "BackupData".
You may want to perform a
quick format. A regular format can take over an hour on a drive over 1 TB.
- Review the summary information that is presented. If you wish to make
any changes you can press Back to go through the process again. Otherwise, Windows is now ready to format the new drive. Press Finish to begin
formatting the drive.
- When Windows has finished formatting the new drive, you will return to the
Server Manager screen. Now you can see that the new drive appears in the list above and it is ready
to use.
Step 3 - Download and Setup the Backup for Workgroups Backup Server
At this point you should have selected the computer that you plan to use as
the Backup for Workgroups Backup Server and you also have the backup storage unit in
place, formatted and ready to use.
You are now ready to download the Backup for Workgroups setup program.
Go to the computer that you have selected as the Backup for Workgroups Backup
Server. Click on the Download button below. Enter your contact information
then return to this page to continue following the instructions.
- Go to the Backup Server.
- Run the bfwsetup program.
- Press the button to agree to the license agreement. The setup program
will now install Backup for Workgroups. When the installation process is
complete, the Welcome screen appears.
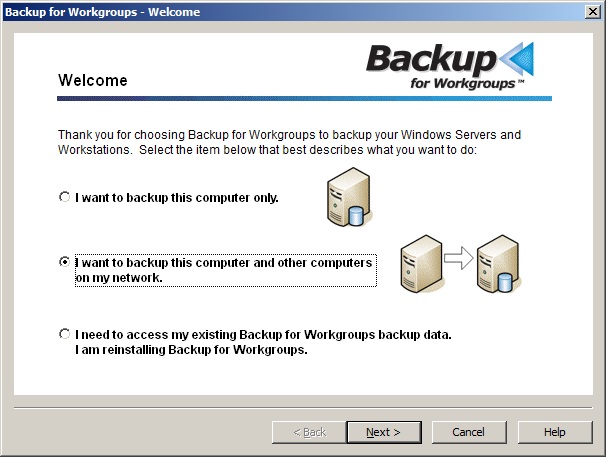
- At the Welcome screen choose the middle button to indicate that you want to backup
this computer and other computers on your network. Press Next.
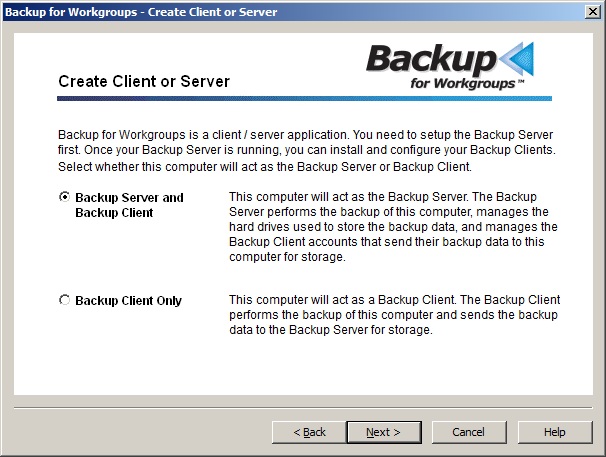
- On the Create Client or Server screen - You need to select the top
item because this computer is going to operate as your Backup Server. Press Next.
- The next screen the Setup Wizard presents is the Backup Storage
Location dialog. What you need to do on the Backup Storage Location dialog
depends upon the type and location of your backup storage media. In
general, there are two (2) types of storage media: storage that shows up
as a Windows Drive letter or storage that is accessed through a UNC path to a
network share.
The Backup for Workgroups default automatically selects the largest drive on your
computer that has most free space. The setup program should automatically select the
internal or USB drive
because in our example, it is the drive with the most free space. As seen
above, Backup for Workgroups is going to store your backup data on the X: drive,
under the BFW Backup Data directory. If the Setup program does not
automatically select the correct storage location, then use the drop down box to select the
internal drive or the USB Drive.
If you plan to use a NAS unit or network share as the backup storage drive,
then click here for how to setup a network share.
- Select the computers to backup.
Now you are ready to select the computers that you plan to backup. The computer running the Backup Server is automatically
added to the list. Use the Add Client to Backup List button to add more computers (which we call Clients) to the list. When you are using the trial
software, you can backup up to ten (10) computers during the evaluation period.

The setup program scans your network and creates a list of computers in
the same domain as the backup server or in the same workgroup. You
can select the computers by using the drop down list under the Net
Client Name field. If you have other computers on your network
that do not show up in the list, you can type them into the field
labeled "New Client Computer", assign the account a password and press
the "Add Client to Backup List" button.
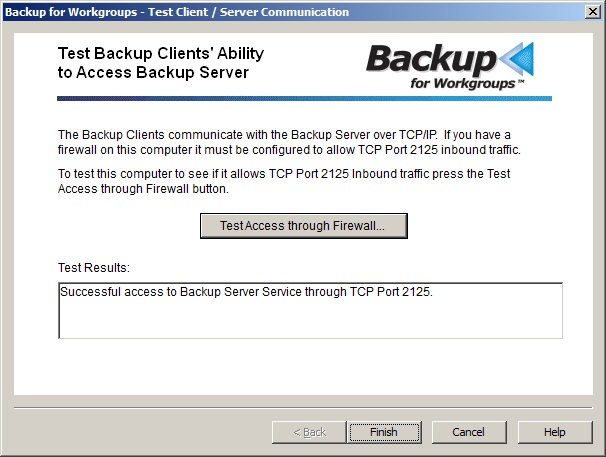
- Check the communication between the Backup Clients and the
Backup Server. The Backup Clients communicate with the
Backup Server over your network using TCP/IP port 2125. If there
is a firewall on the computer running the Backup Server you need to
instruct the firewall to open port 2125 for TCP inbound.
Press the Test Access through Firewall button to make sure your Backup Clients can communicate with the Backup Server.
If your test is successful, your firewall should be fine and you can
continue to the next step.
If the test indicates a problem, you will need to open your firewall for
port 2125. This port is registered and has been assigned to Lockstep
Systems by the Internet authority IANA. The Backup Clients connect to the Backup Server, so from a TCP/IP perspective,
the Backup Client makes an outbound connection. The Backup Server receives
the connection as an inbound event on port 2125. So, the firewall on the
Backup Server must be configured to allow inbound TCP port 2125.
At the computer running your Backup Server, open your firewall manager. This may be
accessible under Control Panels or as part of an antivirus program. You need to create a rule to
allow TCP port 2125 for inbound. Once you have configured your firewall to allow port 2125 for inbound TCP,
then repeat the test on this panel.
Once you have the firewall configured to allow port 2125 in bound TCP, then the backup clients
will be able to connect to the Backup Server software
that you have just installed on this computer.
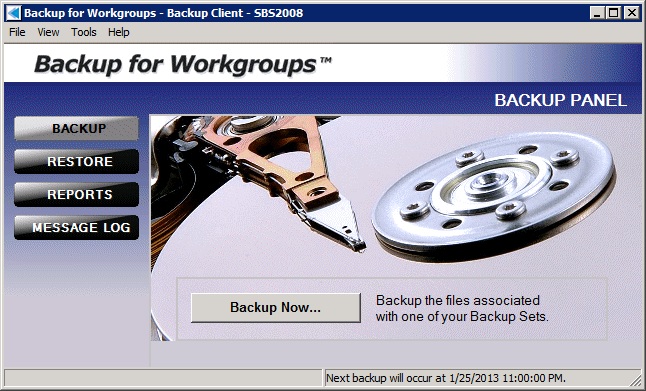
- Press Finish to complete the setup. Now the Backup for
Workgroups main program screen appears, as seen below.
Backup for Workgroups has a built-in backup set that is defined to backup all local drives
on the Windows Servers at 11:00 pm and all local drives on your Windows workstations at noon. Backup for Workgroups also has a built-in
open file add-on that allows the backup process to backup locked files on the
server, this includes Exchange, SQL Server, and Domain Controller Active
Directory databases.
You can press the Backup Now... button to start your baseline backup now, or
you can let the default, scheduled backup execute at its scheduled time. Please note
that your computer must be powered on at 11pm for servers and noon for
workstations, in order to perform the backup.
If this time is inconvenient or you prefer another time, you can go to
Tools>Manage Backup Sets to change the time on the All Local Drives backup set.
Step 4 - Install the Backup Clients
The Backup for Workgroups Backup Client is software that you install on each
computer that you want to backup. This software runs on the computer,
reads the files selected to be backed up, compresses and encrypts the backup
data. Then, the Backup Client transmits the backup files to the Backup Server for storage.
You will need to repeat these steps on each computer that you want to backup.
NOTE that each computer to backup needs to have a separate account at the Backup
Server. This avoids what we call "co-mingling" of data in which two (2)
computers backup data into the same account making it difficult to restore data
to the proper computer.
Go to each computer you want to backup and run the Backup for Workgroups Setup program (BFWSETUP.EXE).
This is the same setup program you downloaded above. The bfwsetup program
is used to setup both Backup Servers and Backup Clients.
- On the computer that you would like to include in the backup
process, run the bfwsetup program.
If you need to redownload the setup program
you can do so with this link.
- Press the button to agree to the license agreement. The setup program
will now install Backup for Workgroups. When the installation process is
complete, the welcome screen appears.
- At the Welcome screen choose the middle item to indicate that you want to backup
this computer and other computers on your network. Press Next.
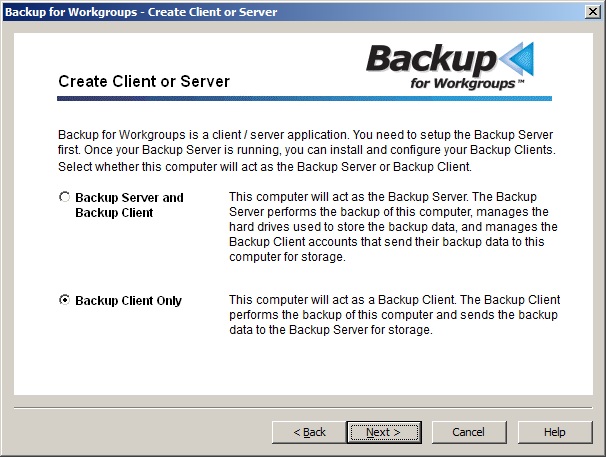
- At the Create Client or Server, choose Backup Client Only. You want to install the Backup Client software
on this computer and send the backup data to the Backup Server for storage.
Press Next.
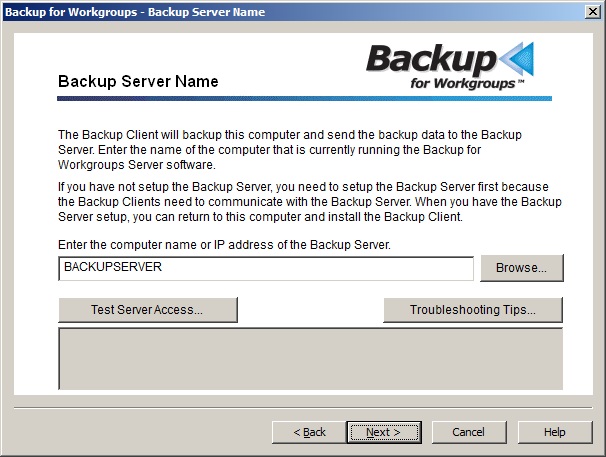
- At the Backup Server Name panel, enter the name of the computer on
which you installed the Backup Server software.
You can enter the name of the computer running the Backup Server software or its
IP address. Then press Test Server Access to make sure that the Backup
Client can connect to the Backup Server. When you get a successful access
to the Backup Server press Next. If the Backup Client cannot connect, then
check the name of the backup server or firewall settings. Most firewalls
at the client computers will allow all TCP communication outbound without
needing to change the settings. If the firewall on this computer blocks
outbound TCP, then configure the firewall to allow any port to communicate
outbound TCP to port 2125.
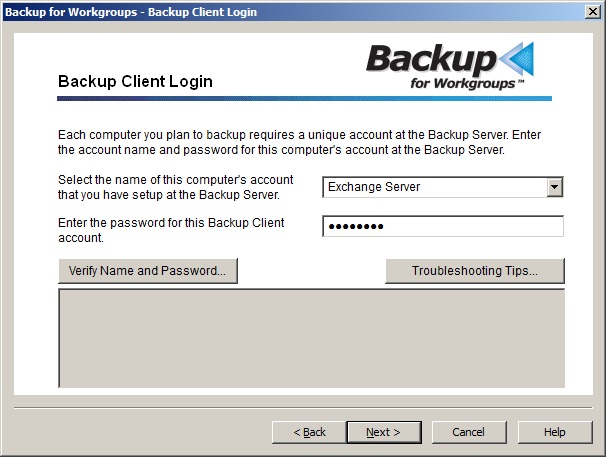
- At the Backup Client Login panel, the drop down list will display
the account names that you created at the Backup Server. Select the
account name that you want to use to backup this computer.
Enter the password that you had created for this account.
If you do not know the name of the account or password, then go to the Backup Server and look at the Clients panel.
Press the Verify Name and Password button. If the verify states that
the account name or password is incorrect, change the password until you get
a clean results from the verify. Then press Next to continue.
- The setup wizard will display a panel indicating that your account
is being synchronized with the Backup Server. When this process
completes, the Backup for Workgroups main window appears.
Now you are ready to press the "Backup Now" button and start a complete backup of this computer. The Backup Client
will backup the files
on this computer and send the files to the Backup Server. The Backup Server
then stores the files for all Backup Clients to the Backup Storage.
HELPFUL TOPICS....
- Backup for Workgroups comes with a default backup set called "All Local Drives", which covers every file and folder
found on hard drives local to that computer. We recommend leaving this backup set intact for the most comprehensive
backup coverage.
However, after installation you can customize Backup for Workgroups to better fit your individual needs and schedule.
Create additional backup sets to schedule more frequent backups for critical data. To create or modify a backup set run the Backup Client and
go to Tools > Manage Backup Sets and proceed through the wizard.
- Keep in mind that the first backup takes the most time, because it is
the first, or "baseline" backup. Subsequent backups are sometimes
called "incremental backups," because only the changes are captured.
Incremental backups keep your backup window, or time to backup, to a
minimum.
|