How to use Backup for Workgroups to backup one Windows ServerBackup for Workgroups makes it easy to backup your Windows Server. It takes just 3 steps.
That's it - with just 3 steps you can begin backing up your Windows server with Backup for Workgroups. Backup for Workgroups supports Windows Server 2019 / 2016 / 2012 / 2008 / 2003 both 32 bit and 64 bit and the Small Business versions of Windows Server. It includes an open a file add-on that allows the backup process to backup all files on the Windows Server including locked files such as Exchange Database files, SQL Server Database files, and Domain Controller's Active Directory. Follow the 3 simple steps below to backup your Windows Server: Step 1 - Select Storage DriveBefore downloading and installing Backup for Workgroups you will need to have your storage drive in place and accessible by your Windows Server. You can use an internal hard drive, and external drive such as USB or eSATA, or a NAS or network share. Backup for Workgroups supports just about any storage that is accessible by Windows and appears as a hard drive, here are the most common.
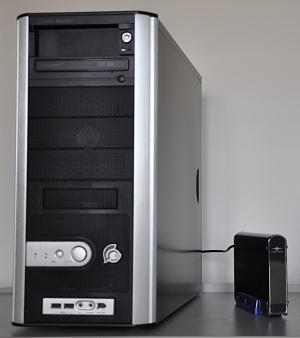
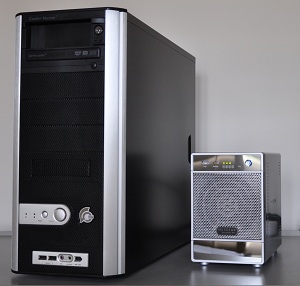
Using External Hard Drives to hold your backup dataMany people do not want to open up their computer to install an internal drive, which makes using external drives a convenient alternative. There are many vendors that offer inexpensive external USB or eSATA drives that you can purchase and attach to the Windows Server that you want to backup. When you choose to backup to an external drive, you will need to format the drive as NTFS and assign it a drive letter. We recommend using a drive letter that is high in the alphabet, letters that are closer to Z than A. Windows assigns drive letters to devices as they are attached to your server. When you select a drive letter for your primary storage drive to be a letter that is high in the alphabet, it will not conflict with other USB devices such as flash drives, which Windows assigns to the next available letter that is low (or close to C) in the alphabet. Example: Here is a generic Windows Server that we plan to backup to the attached, external USB drive as seen in the picture below:
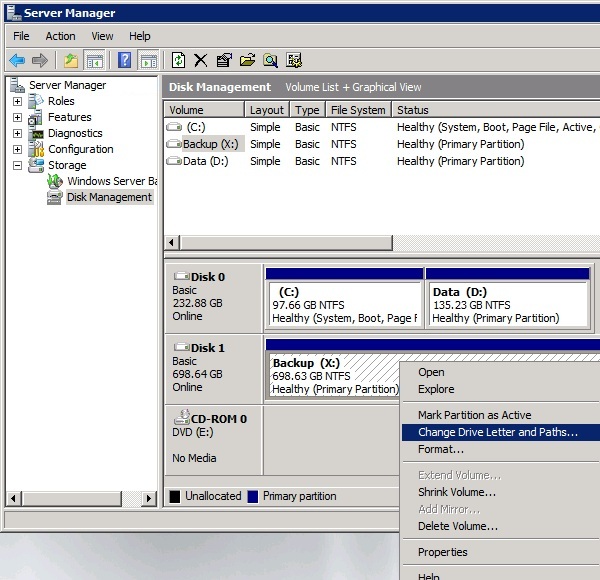
Now that you have your hardware in place, you are ready to format the external USB drive and assign it a drive letter that is high in the alphabet. In our example, we will use the letter X. To format your external USB storage drive and assign it a drive letter1. At the Windows Server's Desktop - right click on "Computer" and choose "Manage." 2. At the "Server Management" screen expand the Storage section and select 'Disk Management." 3. Make sure the drive is formatted as NTFS. In the screen shot below we can see the drive is formatted as NTFS. If this is reported as FAT32, then Right click on the drive and choose Format. Then proceed to format the drive as NTFS. Note you can perform a quick format to save time.
4. Assign the drive letter. In the center section of the screen right click on the USB drive and choose "Change Drive Letter and Paths." 5. Select the drive letter X: (or any letter that is high in the alphabet) and save your changes. The USB drive is now ready to be used to store the backup data. Step 2 - Download the Backup for Workgroups Setup ProgramAt this point you should have your USB drive connected to your Windows Server and the drive is formatted and ready for use. You are ready to download the Backup for Workgroups setup program. If you are using the computer that you plan to backup, go ahead and click on the Download Now button below. Enter your contact information then return to this page to continue following the instructions.
Step 3 - Run the Backup for Workgroups Setup ProgramYou are now ready to run the setup program. 1. Go to the Windows Server that has the USB drive attached that is ready to receive your backup files. 2. Run the bfwsetup program.
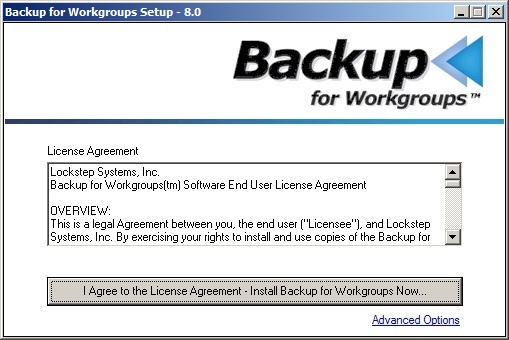
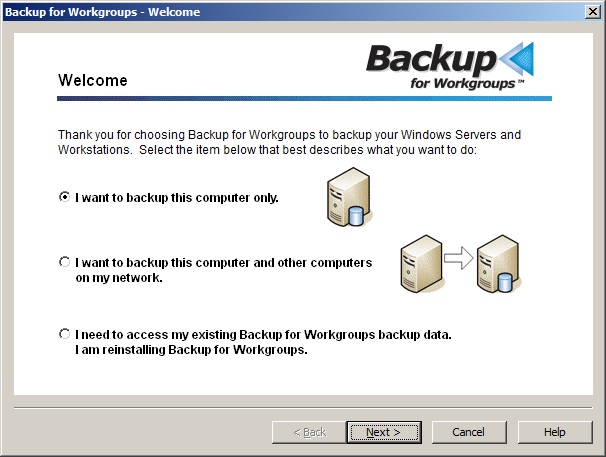
3. Press the button to agree to the license agreement. The setup program will now install Backup for Workgroups. When the installation process is complete, the welcome screen appears.
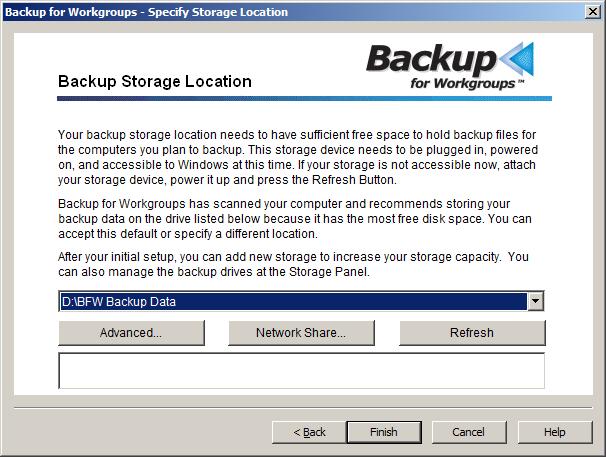
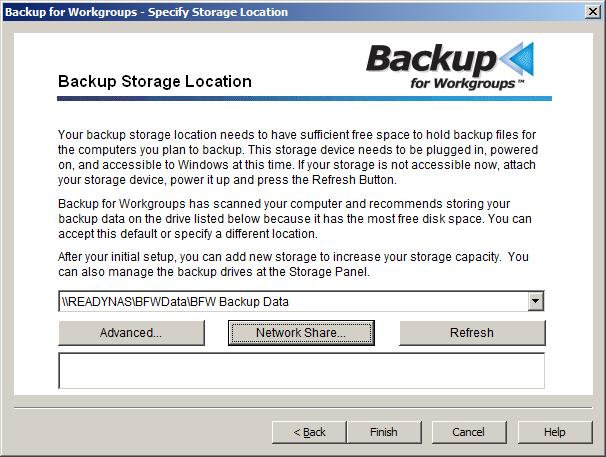
4. At the Welcome screen choose the top item to indicate that you want to backup this computer. Backup for Workgroups will setup one backup client account for this computer. Press Next. 5. On the Backup Storage Location dialog, you inform Backup for Workgroups of the location of the backup storage device.
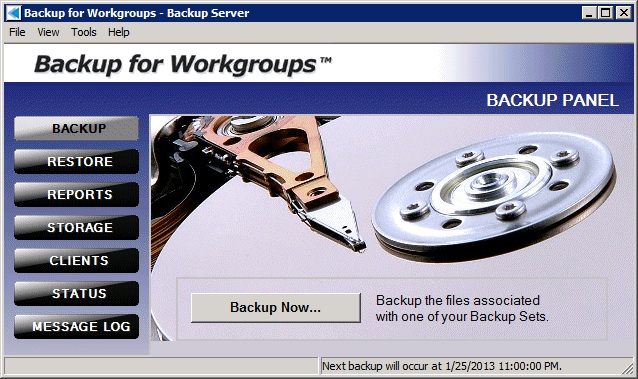
Backup for Workgroups will default to selecting the largest drive on your computer that has most free space. The setup program should automatically select the USB drive because in our example, it is the drive with the most free space. As seen above, Backup for Workgroups is going to store your backup data on the X: drive, under the BFW Backup Data directory. If the Setup program does not automatically select the correct storage location, then use the drop down box to select the USB Drive. If your USB drive does not show up in the drop-down list, make sure the drive is powered on, formatted in NTFS, and assigned a drive letter and is accessible to Windows. Then, press the Refresh button to tell the Setup program to rescan your computer for the available drives. 6. Press Finish to complete the setup. Now the Backup for Workgroups main program screen appears, as seen below.
Backup for Workgroups has a built in backup set that is defined to backup all local drives on the Windows server at 11:00 pm. Backup for Workgroups also has a built in open file add-on that allows the backup process to backup locked files on the server, this includes Exchange, SQL Server, and Domain Controller Active Directory databases. You can press the Backup Now... button to start your baseline backup now, or you can let the default, scheduled backup execute at 11pm. Please note that your computer must be powered on at 11pm in order to perform the backup. If this time is inconvenient or you prefer another time, you can go to Tools>Manage Backup Sets to change the time on the All Local Drives backup set.
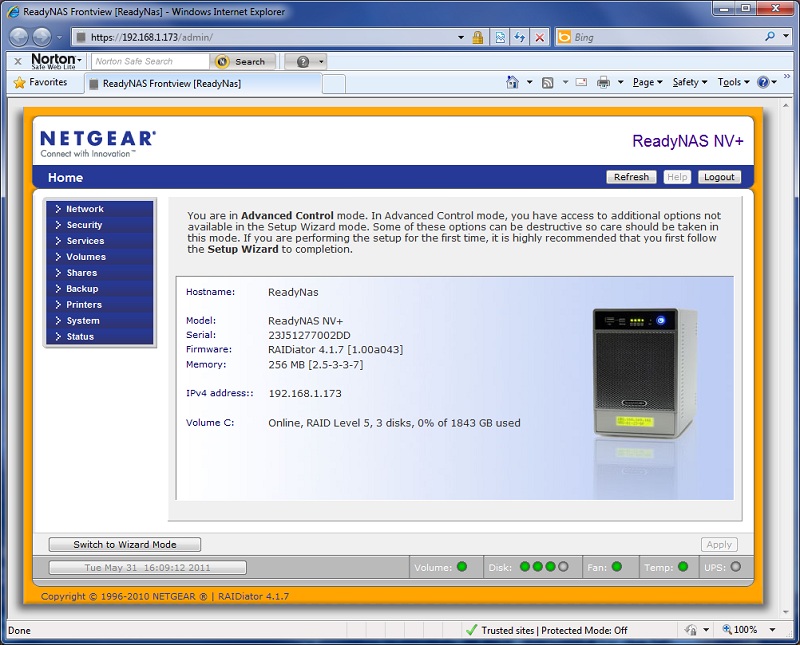
Using Network Shares and NAS units to hold your backup dataIf you have an existing NAS unit or a network share to another computer with the appropriate free storage space, you can use it to store your backup data. NAS units are handy because you can add storage to a network at will. If you have a computer that has a large amount of storage you can use a network share to that computer. Whether you are using a network share to another computer or a NAS unit, the setup is basically the same. In our example below we are using a NAS unit but if you have a network share to another computer just follow the same steps substituting the other computer in place of our example NAS unit. In our example below we have one Windows server with a NetGear ReadyNAS on the network with the server.
The most common issues with NAS units is rights and permissions. When you are using a NAS unit to hold your backup data, the first thing you need to do is properly configure the rights and permissions to grant Backup for Workgroups access to the NAS unit. To Configure Rights and Permissions on your NAS device:1. Go to the Windows Server that you want to backup. 2. You need to access the NAS unit's configuration panel. Most NAS units contain a web interface that is used to configure their settings. Open a web browser and enter the IP address of the NAS unit or its name. 3. Login into the NAS Unit.
4. Most NAS unit will create a default share. In the case of our example, the NetGear Ready NAS creates a share named Backup and gives everyone full access. If your NAS unit does not create network shares then follow these steps to add a network share to the NAS unit.
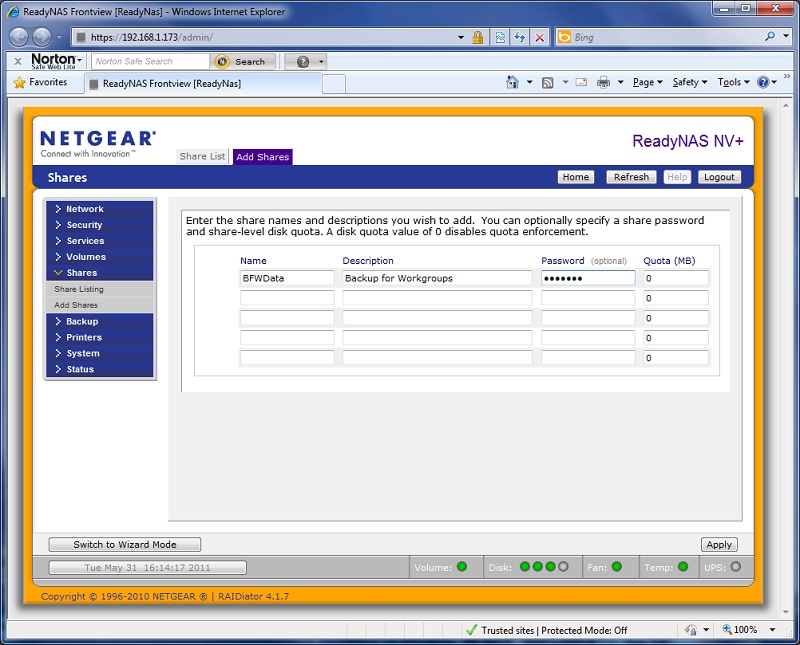
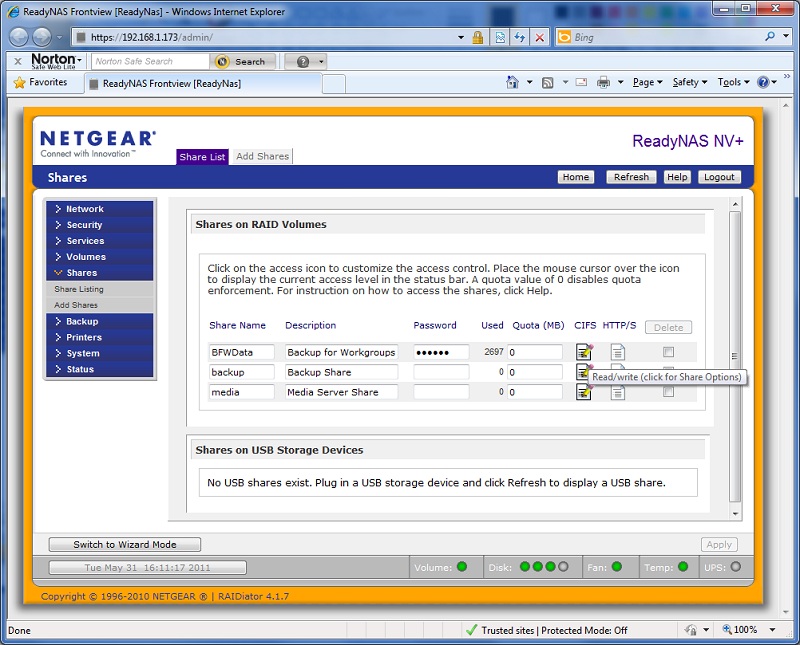
5. Go to the Add Shares option on your NAS device. In our example, we used the menu on the left to expand Shares and select Add Share. The ReadyNAS displays a grid. Enter the name of the share you want to create. If you do not provide a password, everyone will have open access to the backup data. Once you create your share press the Apply button to save your changes. 6. Go to the Share Listing option in the menu to verify the settings for this network share.
You want to verify that the network share has read/write access in order to grant full permissions to Backup for Workgroups. In this case, when we hover over the CIFS section, we can see a tool tip that shows Read / Write access. This is what Backup for Workgroups needs; it needs to be able to read/write files, create and delete files and have the ability to change the names of files. 7. Be sure to verify that the Recycle Bin is disabled for this network share. You DO NOT want to activate the recycle bin. When the recycle bin is active the NAS will keep copies of files that are deleted. This will quickly fill up the NAS unit and you will run out of disk space at the unit. To make sure the recycle bin is turned off, click on the icon under CIFS for the share we created. When you click on that icon, the following screen appears.
8. Now you can make sure the Recycle Bin is unchecked / unticked so that it is disabled. Some NAS units call the Recycle Bin the Trash Box. Again, if you do not disable the Recycle Bin on the NAS you will run out of disk space. 9. At this point, you should now have your NAS unit configured and ready to use. You can verify this by pressing the Start button at Windows and select Network. This will show your NAS in the list of Network devices. Double click on the NAS unit and you should see the list of shares- which should be the same as you had seen in the NAS configuration screen. Double click on the share we created and if you provided an account name and password, Windows will ask you for that account name and password to login to the network share. Enter the account name and password and log into the share. Step 2 - Download the Backup for Workgroups Setup ProgramYou are ready to download the Backup for Workgroups setup program. Click on the Download Now button below. Enter your contact information then return to this page.
Step 3 - Run the Backup for Workgroups Setup ProgramYou are now ready to run the setup program. 1. Go to the Windows Server that you have downloaded the Backup for Workgroups setup program. 2. Run the bfwsetup program.
3. Press the button to agree to the license agreement. The setup program will now install Backup for Workgroups. When the installation process is complete, the welcome screen appears.
4. At the Welcome screen choose the top item to indicate that you want to backup this computer. Backup for Workgroups will setup one backup client account for this computer. Press Next. 5. On the Backup Storage Location dialog, you inform Backup for Workgroups of the location of the backup storage device.
Backup for Workgroups will default to selecting the largest drive on your computer that has most free space. This is not the selection that you want. Since you are intending to store your backup data to a network share or NAS, you will need to tell Backup for Workgroups how to access the NAS unit/network share. 6. Press the Network Share button. Backup for Workgroups will warn you of common problems encountered with NAS units. Accept the limitations of network shares/NAS units and you will now see the Select NAS Devices screen.
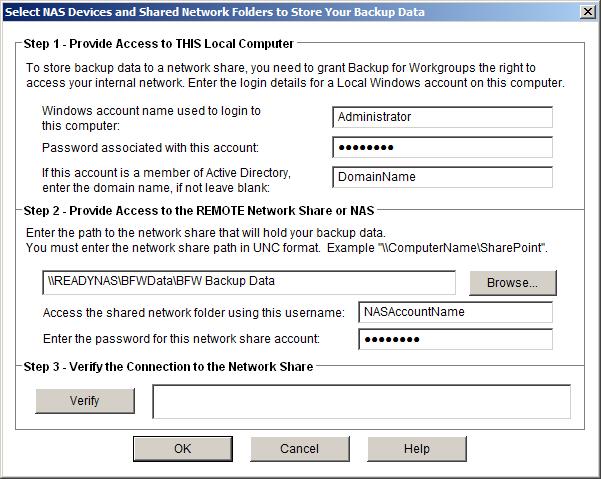
You use this dialog to establish access to/with the NAS unit/shared network folder. In order for Backup for Workgroups to store your backup data to the NAS unit, you will need to provide two basic groups of information. The first is a local Windows account and the second is an account at the NAS unit. 7. In the top portion of this screen, in the section marked Step 1, enter the name and password of a Windows account that exists on this Windows Server or is within the domain this server is a member of. If this is a standalone server, then leave the Domain Name portion blank. If this Windows Server is a member of a domain, then enter the domain name in the Domain Name section. Backup for Workgroups runs as a service under the Windows Local SYSTEM account. This account is built-in to Windows for the purpose of allowing Services to access the files on the local Windows Server. But, the Local SYSTEM account is restricted and CANNOT directly access network shares. As a result, you need to provide a Windows account that is local to this computer or a Windows account that is a member of the domain that this Server is a member of. The account you provide is used by Backup for Workgroups to grant it the right to access shares outside of the server. You can think of the top half of this dialog as the process of being "granted the right to look outside of the Windows Server." The two most common Windows accounts to use are the Administrator account and the account that you are logged into at the Windows Server (if different than the administrator). 8. In the section labeled Step 2, you specify how to access the network share at the NAS unit. First, enter the path to the network share in UNC format. UNC format starts with "\\" then the name of the NAS unit followed by a "\" and the share name. You can also enter a folder to use under the share name. We recommend using a folder under the share name so that if anyone looks at the network share, they will read the folder name and the name indicates the type of data stored there. In our example out NAS unit is named "ReadyNAS" it has a share named "BFWData" and we intend to store the backup data in a folder named "BFW Backup Data". This is entered as "\\ReadyNAS\BFWData\BFW Backup Data". Again the goal of using the folder named "BFW Backup Data" is that if someone would look at the share "\\ReadyNAS\BFWData" they would see the folder that tells them the contents are BFW backup data. Now you are ready to enter the name of an account at the NAS unit that has FULL ACCESS to this network share. If the NAS is configured to use a share that is accessible by everyone, the account name may not matter. If you had created an account name then enter that name and its password. NOTE: Some NAS unit can join domains, so you may need to enter the account name in the form "DomainName\AccountName". Some NAS units that are standalone and not members of a domain require you to enter the NAS host name as a domain name. For example "ReadyNAS\UserName". You may have to experiment since there is no consistent naming convention between NAS manufactures. 9. Press the Verify button. When you press the Verify button, Backup for Workgroups will use the settings that you have provided to access the network share. This proves your settings will allow Backup for Workgroups full control over the files at the network share. If you receive any errors, correct the items on this dialog until you get a successful verification. When you have verified your connection, press OK.
10. Backup for Workgroups displays the UNC path to the network share as the Backup Storage Location. Press Finish to complete the setup. Now you are ready to use Backup for Workgroups to backup your computer. You should see the main Backup for Workgroups screen below.
Backup for Workgroups has a built in backup set that is defined to backup all local drives on the Windows server at 11:00 pm. Backup for Workgroups also has a built in open file add-on that allows the backup process to backup locked files on the server, this includes Exchange, SQL Server, and Domain Controller Active Directory databases. You can press the Backup Now... button to start your baseline backup now, or you can let the default, scheduled backup execute at 11pm. Please note that your computer must be powered on at 11pm in order to perform the backup. If this time is inconvenient or you prefer another time, you can go to Tools>Manage Backup Sets to change the time on the All Local Drives backup set.
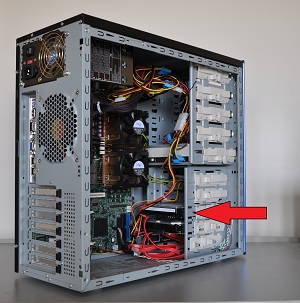
Using Internal Hard Drives to hold your backup dataUsing internal hard drives to hold your backup data is the most optimal backup storage configuration. This type of backup configuration provides the most reliable solution because the backup storage drive(s) is/are always available and accessible. Unlike USB drives and NAS units that can be powered down separately from your server, internal drives are always available concurrently with your running server. Another benefit of using this backup configuration is that it makes it easy to comply with off-site storage requirements by using an external USB drive as a mirror drive. When you use internal storage drive(s) for the primary storage location, the internal drive is continuously available and you can use a transient external drive as a mirror. In our example below, we have purchased a new, bare drive, sometimes called an OEM drive. This is just a simple SATA drive with a large capacity. We opened up the server case and inserted the additional hard drive as marked by the red arrow below.
Now we can put the computer case back together and power up the Windows Server. Since this drive is an empty drive it will need to formatted. To format a new, blank, internal hard drive:1. At the Windows Server's Desktop - right click on "Computer" and choose "Manage." 2. At the Server Management screen expand the Storage section and select Disk Management. Windows will pop-up a wizard, to walk you through the process of formatting the new drive and assigning it a drive letter. If this wizard does not pop up, right click on the drive and choose Format.
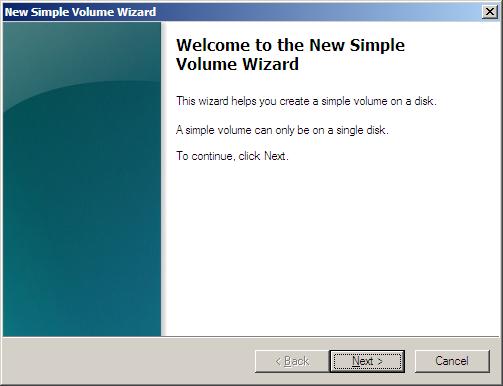
Press Next to navigate from the Welcome screen to the New Simple Volume Wizard as seen below.
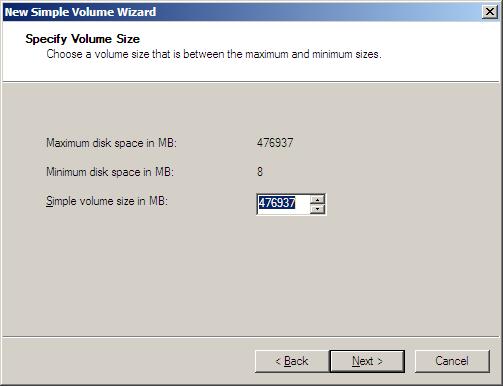
Enter the amount of the drive to setup for this volume. Normally you would use the default to use the entire drive space. Press Next to continue.
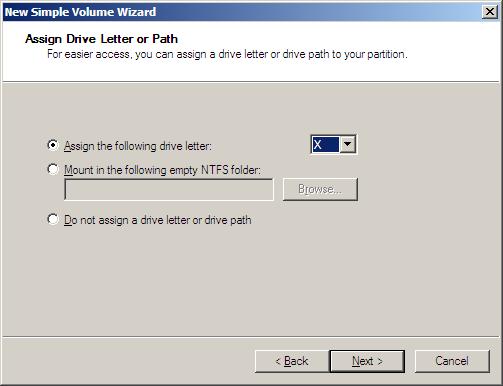
You can now specify a drive letter for the new drive. We suggest a drive high in the alphabet for several reasons. The first reason is when there is a gap in the drive letter sequence it works like a comment to yourself that this drive is for a specific reason - namely to be used for backup data not routine file storage. The second reason for setting a high drive letter is to avoid conflicts with other drives or USB devices that may not be attached at this time. Press Next.
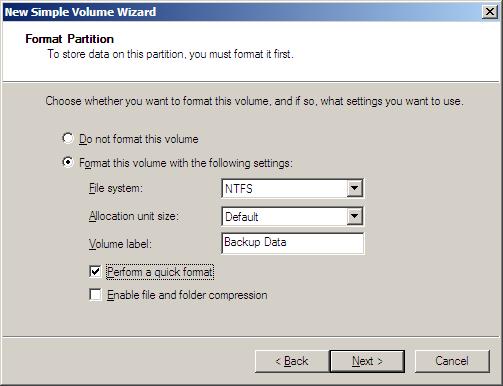
Choose to format the drive as NTFS. You can enter a Volume Label that is a comment to yourself. We recommend using a volume label such as "Backup Data". Since most drives today are high capacity drives, you may want to perform a quick format. A regular format can take over an hour on a drive over 1 TB. Press Next.
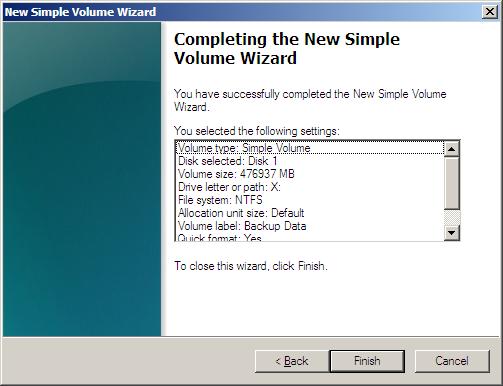
Review the summary information that is presented. If you wish to make any changes you can press Back to go through the process again. Otherwise, Windows is now ready to format the new drive. Press Finish to begin formatting the drive. When Windows has finished formatting the new drive, you will return to the Server Manager screen, which was still open before we used the Wizard to format the drive.
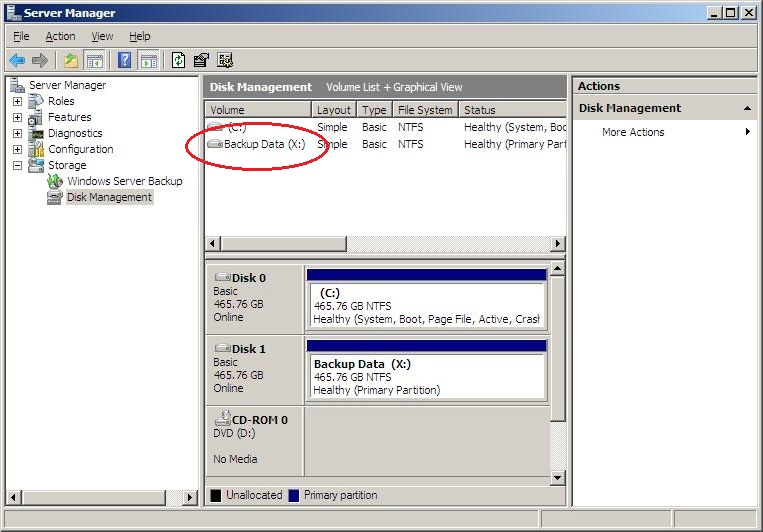
Now you can see that the new drive appears in the list above and it is ready to use. Step 2 - Download the Backup for Workgroups Setup ProgramAt this point you should have your USB drive connected to your Windows Server and the drive is formatted and ready for use. You are ready to download the Backup for Workgroups setup program. Click on the Download Now button below. Enter your contact information then return to this page.
Step 3 - Run the Backup for Workgroups Setup ProgramYou are now ready to run the setup program. 1. Go to the Windows Server that has the USB drive attached that is ready to receive your backup files. 2. Run the bfwsetup program.
3. Press the button to agree to the license agreement. The setup program will now install Backup for Workgroups. When the installation process is complete, the welcome screen appears.
4. At the Welcome screen choose the top item to indicate that you want to backup this computer. Backup for Workgroups will setup one backup client account for this computer. Press Next. 5. On the Backup Storage Location dialog, you inform Backup for Workgroups of the location of the backup storage device.
Backup for Workgroups will default to selecting the largest drive on your computer that has most free space. The setup program should automatically select the internal drive because in our example, it is the drive with the most free space. As seen above, Backup for Workgroups is going to store your backup data on the X: drive, under the BFW Backup Data directory. If the Setup program does not automatically select the correct storage location, then use the drop down box to select the internal Drive. 6. Press Finish to complete the setup. Now the Backup for Workgroups main program screen appears, as seen below.
Backup for Workgroups has a built-in backup set that is defined to backup all local drives on the Windows server at 11:00 pm. Backup for Workgroups also has a built in open file add-on that allows the backup process to backup locked files on the server, this includes Exchange, SQL Server, and Domain Controller Active Directory databases. You can press the Backup Now... button to start your baseline backup now, or you can let the default, scheduled backup execute at 11pm. Please note that your computer must be powered on at 11pm in order to perform the backup. If this time is inconvenient or you prefer another time, you can go to Tools>Manage Backup Sets to change the time on the All Local Drives backup set.
|


Everyday, thousands of corporations, non-profits, and Government agencies use Backup for Workgroups Backup Software to backup their Windows Servers! You can too! Here are just a few of our many customers... |
|
 |
|